Dave stripped one of the external walls today. A few days ago he took up the lino to reveal some nice floorboards underneath, but had the annoying job of having to take out a thousand rusty staples holding the lino on. We think the room is a lot colder with no gib on the inside, which should hopefully make insulation the walls very effective.
Friday, 24 December 2010

Thursday, 9 December 2010
Leadlight No. 1
For the past 6 months or so I've had a new hobby: leadlighting.


The leadlight teacher tells me it'll take me 2 years to do it all. I told him I was going to do it by Xmas 2011 (18 months).
Leadlighting is not difficult, but it is fiddly, with many different stages, which are, in summary
Our house has a door with five windows around it (there must be a name for this kind of door but I don't know what it is and nor does mr google).
As you can see some idiot has painted the top window mud brown. (what is it with painting things brown in this house?!) And the two panels either side are not glass but chipboard (with holes in).
So I enrolled in a leadlighting course with an idea that I would replace the mud brown window with a leadlight. I hadn't got much further than that idea when I showed up and the first class was very stressful as I had to design my leadlight and didn't really like any of the designs I'd found.
Because of the diamonds in our existing hall leadlight (the one stained with nicotine) - see...
I decided I'd go with diamonds as the main theme. Anyway, after my second week on the course I'd already decided one window wouldn't be enough and that I would in fact replace all five windows. You may recall my vision:
The leadlight teacher tells me it'll take me 2 years to do it all. I told him I was going to do it by Xmas 2011 (18 months).
Leadlighting is not difficult, but it is fiddly, with many different stages, which are, in summary
- Design (probably the most difficult) as so much potential to get it wrong early on and later have to fix it
- glass cutting (quite easy, but if you get it wrong you have to grind down to the right shape which can take ages)
- Leading (the lead is U-shaped and the glass fits into it, if that makes sense) - a bit fiddly as you have to cut the lead to exactly the right length
- Soldering the lead points together
- Cementing (very messy)
- Blackening (a purely cosmetic procedure)
So for my window, which is about 85cm *38cm, it has taken me two 8 week courses (and that includes some working at home). And here's the end result...

I'm still busy designing the other four panels but I'm thinking I'll do the two small windows at the top next (because I will get more skilled and it's best to leave the most visible sections to the end). I will get them all fitted together, aiming for December 2011.
Wednesday, 6 October 2010
The art of insultation
We spent a couple of months doing the underfloor insulation and this is the result. We used polystyrene panels which are cut to fit joists and concertina cut to allow a bit of compression. They then fit snugly without the need to nail them in. The panels come in packs of 12 and we were 1 short so I did a patch job with leftover bits on the very last bit. We could only get 24 panels in the car at a time which is why we've been gradually working on it rather than doing it all in one go.
The title of the blog entry relates to an amusing typo at the Placemakers DIY store where we went at least once a weekend for the past 2 months...
 We have a proper basement, half of it is well above head height and most of it allows you to crouch-walk, only a small proportion requires the awkward shuffling on your back to do the insulation. This is not accident but design on our part - we were specifically looking for a house with an accessible basement to allow us to insulate it (saving 15% of heat loss, apparently)...
Total cost of the underfloor insulation for our 130m2 house was $1088 (but there is a part that can't be insulated) so it might be around the $1200 mark for the whole lot if we could do it all.
So we look forward to a much warmer winter next year :-)
Monday, 13 September 2010
Bye bye carpets
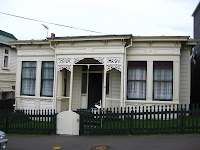
I finally managed to finish my work on the front of the house. Here are the before and after shots showing my work at repairing and repainting the fence. As the next-door-neighbour said - it makes it look "cared for". The whole house needs repainting in the next couple of years but right now that's not high on our list of priorities.

Meanwhile Steve just couldn't wait any longer, the carpets had to go. I am gradually doing the underfloor insulation, have now done about half of it... but September (spring!) is here so Steve got suited up in his asthma defence outfit to rip up some carpet anyway. Ironically the main reason for getting rid of the carpet is to alleviate the symptoms of asthma but the process is an incredibly dusty one.
The carpet, to remind you, is a threadbare brown shagpile. At a guess 40 years old. You certainly couldn't buy a carpet like it today!
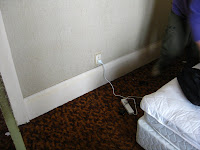
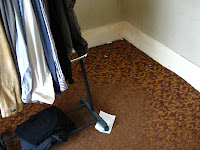

So when taking up the bedroom carpet we discovered not only underlay but also, an even more ancient carpet underneath in an indiscernable and overly stained shade of grey. Difficult to imagine a carpet less attractive than the one on top, but there it was! That is lazy renovation - they couldn't even be bothered to take up the old carpet before fitting the next one!
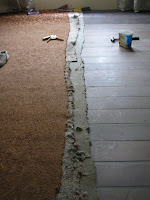 Under the living room carpet we discovered a nice green hearth from where the fireplace was before being boxed in and some bizarrely poo-brown painted floorboards. I just don't get this. If you're going to paint your floorboards, why paint them the colour of wood?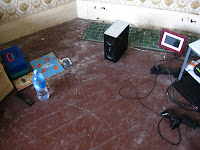
The bedroom revealed some lovely reddish brown rimu floorboards. And a heap of staples to be removed from where the carpet was being held down. I have blisters on my hand from heaving them up.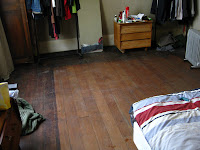 The next job will be to do the sanding. Still got to take up the carpet in the hall and other two bedrooms and then we'll hire a sander and do the lot together. The carpets are history and have started their next life in our basement. Anyone want any old carpet, we've got a bit going begging....?
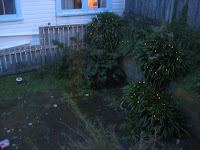
The next job will be to do the sanding. Still got to take up the carpet in the hall and other two bedrooms and then we'll hire a sander and do the lot together. The carpets are history and have started their next life in our basement. Anyone want any old carpet, we've got a bit going begging....?Steve's final job this weekend was to install solar lights in the garden. It makes the very unattractive yard suddenly look much more like a place you might want to spend some time :-)
Thursday, 2 September 2010
Building a bookcase
The extent of my woodworking experience so far in my life has been making a clock in Year9 CDT or whatever they called it. So I went on a few woodwork classes because I thought I would be able to learn how to frame all the souvenirs we got when we were travelling. The first thing I made in the class was a tool box made of MDF, and armed with the powerful knowledge of how to make housing joints I got some reclaimed wood from Brennans the house clearers in Kilbirnie and set to work on my first project - a bookcase.
Through July I hand sawed the 2 pieces of really long wood into 2 uprights and 5 shelves, with bits leftover for a top and bottom. Into the uprights I chiselled housing joints 2 cm wide and 1.5cm. After the first one, with 9 left, I was having second thoughts about this approach but ploughed on. They got a bit easier and quicker with each one, but were definitely a labour of love, especially bearing in mind the work they entailed later on when I assembled it all.
When I'd done one side of housing joints I realised that where I planned to have each housing joint didn't necessary mean they actually ended up there. I realised this after doing the first one on the other side, then I thought it might be a good idea to lie one upright on another and pencil out the remaining housing joints so that they matched with the ones I had already done, rather than relying on measurements. This proved to be slightly harder then it sounds as one of the uprights has a slight bow meaning that they wouldn't sit together properly.
It was probably about 4 weeks of weekend chisellling and then I got annoyed with slow progress and just spent whole Saturdays bashing away on it. It helped that it rained most weekends in August.
Midway through August I lugged it all upstairs as it was time to start assembling. I laid one of the uprights down in the hall and made sure the shelves when fitted into the housing joints were at a right angle to the front and right angle along the upright. Strangely some of the them didn't fit the housing joint either because it narrowed at one end or narrowed as the shelf went into the housing joint. Both were quite frustrating, having to get on my hands and knees and chisel out a better defined housing joint, up to my ears in wood chippings in our hallway.
When that was done and all shelves fitted, I got the other upright and sat it on top, sliding the shelves into the housing joints. Only a couple fit properly, and if you got the housing joint at the top to fit, then the other end didn't. So it was a process of elimination to see which one in the middle it was. At first I thought I should sand the shelves down but that took ages, so I resorted to chiselling deeper housing joints. It was complicated by the fact that the beds of the housing joints weren't truly level, with my right angle checks earlier sometimes being aided by me holding the shelf in place, whereas now it was resting however it wanted.
I eventually got it to fit, so then I took it all apart and glued the shelves to the first upright with the help of lots of wine bottles to hold the shelves upright. When that was dry I chucked the other upright on top and glued that.
The bookcase didn't have a top or bottom and wouldn't have looked right without them. I managed to break one of the shelves free from its glue by forcing the top between the uprights, which annoyed me, so I reglued the shelf (very badly) and sanded down the edges of the top. As I was reluctant to bring the sander up to the hallway, I made endless trips up and down the stairs to the basement, as I didn't want to sand too much off so that it didn't fit, and it was never quite enough.
The bottom was a whole different story. I had measured the distance between the two uprights and cut down the remaining bit of wood to fit. However when I tried to put it in, it turned out the two uprights weren't quite flush, with one in front of the other. Therefore my oblong piece of wood wasn't going to fit. So I had to cut a massive wedge off the long side. Then I had to do the same as with the top and keep going up and down sanding and trying to fit it in. Very frustrating. My main mistake really was to have the top and bottom sit inside the uprights rather then over them, if you know what I mean.
The next step was to cut and attach a piece of MDF to the back for strength. Although with the housing joints and the top and bottom fitted in rather than out, I don't think I really needed this. But I went ahead so now my bookcase will survive a bomb blast or any terrorist attack.
The MDF was tall and wide and 12mm thick and unbelievably heavy. I had to cut it down to the right size and it proved quite difficult to saw in a straight line without much care and attention.
So there we are finished. One solid wood bookcase. If I was to do it again I might have done dowels rather than housing joints but they look good. I don't think the MDF back needed to be so thick.
I am taking a break from this now but we have a long list of furniture needs and stockpile of wood offcuts so who knows what we might come up with?
 |
| The raw materials for the bookcase seen here in our basement, cut up. Answers on a postcard if you know what the wood is - we think one is oregon. |
Through July I hand sawed the 2 pieces of really long wood into 2 uprights and 5 shelves, with bits leftover for a top and bottom. Into the uprights I chiselled housing joints 2 cm wide and 1.5cm. After the first one, with 9 left, I was having second thoughts about this approach but ploughed on. They got a bit easier and quicker with each one, but were definitely a labour of love, especially bearing in mind the work they entailed later on when I assembled it all.
When I'd done one side of housing joints I realised that where I planned to have each housing joint didn't necessary mean they actually ended up there. I realised this after doing the first one on the other side, then I thought it might be a good idea to lie one upright on another and pencil out the remaining housing joints so that they matched with the ones I had already done, rather than relying on measurements. This proved to be slightly harder then it sounds as one of the uprights has a slight bow meaning that they wouldn't sit together properly.
It was probably about 4 weeks of weekend chisellling and then I got annoyed with slow progress and just spent whole Saturdays bashing away on it. It helped that it rained most weekends in August.
 |
| Jo keeps me company downstairs |
Midway through August I lugged it all upstairs as it was time to start assembling. I laid one of the uprights down in the hall and made sure the shelves when fitted into the housing joints were at a right angle to the front and right angle along the upright. Strangely some of the them didn't fit the housing joint either because it narrowed at one end or narrowed as the shelf went into the housing joint. Both were quite frustrating, having to get on my hands and knees and chisel out a better defined housing joint, up to my ears in wood chippings in our hallway.
When that was done and all shelves fitted, I got the other upright and sat it on top, sliding the shelves into the housing joints. Only a couple fit properly, and if you got the housing joint at the top to fit, then the other end didn't. So it was a process of elimination to see which one in the middle it was. At first I thought I should sand the shelves down but that took ages, so I resorted to chiselling deeper housing joints. It was complicated by the fact that the beds of the housing joints weren't truly level, with my right angle checks earlier sometimes being aided by me holding the shelf in place, whereas now it was resting however it wanted.
I eventually got it to fit, so then I took it all apart and glued the shelves to the first upright with the help of lots of wine bottles to hold the shelves upright. When that was dry I chucked the other upright on top and glued that.
 |
| At last, the uprights and shelves are assembled and glued. The hall was temporarily turned into a workshop, but I wasn't too worried about the carpet. |
The bookcase didn't have a top or bottom and wouldn't have looked right without them. I managed to break one of the shelves free from its glue by forcing the top between the uprights, which annoyed me, so I reglued the shelf (very badly) and sanded down the edges of the top. As I was reluctant to bring the sander up to the hallway, I made endless trips up and down the stairs to the basement, as I didn't want to sand too much off so that it didn't fit, and it was never quite enough.
The bottom was a whole different story. I had measured the distance between the two uprights and cut down the remaining bit of wood to fit. However when I tried to put it in, it turned out the two uprights weren't quite flush, with one in front of the other. Therefore my oblong piece of wood wasn't going to fit. So I had to cut a massive wedge off the long side. Then I had to do the same as with the top and keep going up and down sanding and trying to fit it in. Very frustrating. My main mistake really was to have the top and bottom sit inside the uprights rather then over them, if you know what I mean.
 |
The top and bottom is on. |
The MDF was tall and wide and 12mm thick and unbelievably heavy. I had to cut it down to the right size and it proved quite difficult to saw in a straight line without much care and attention.
 |
| The bookshelf stands proud |


 |
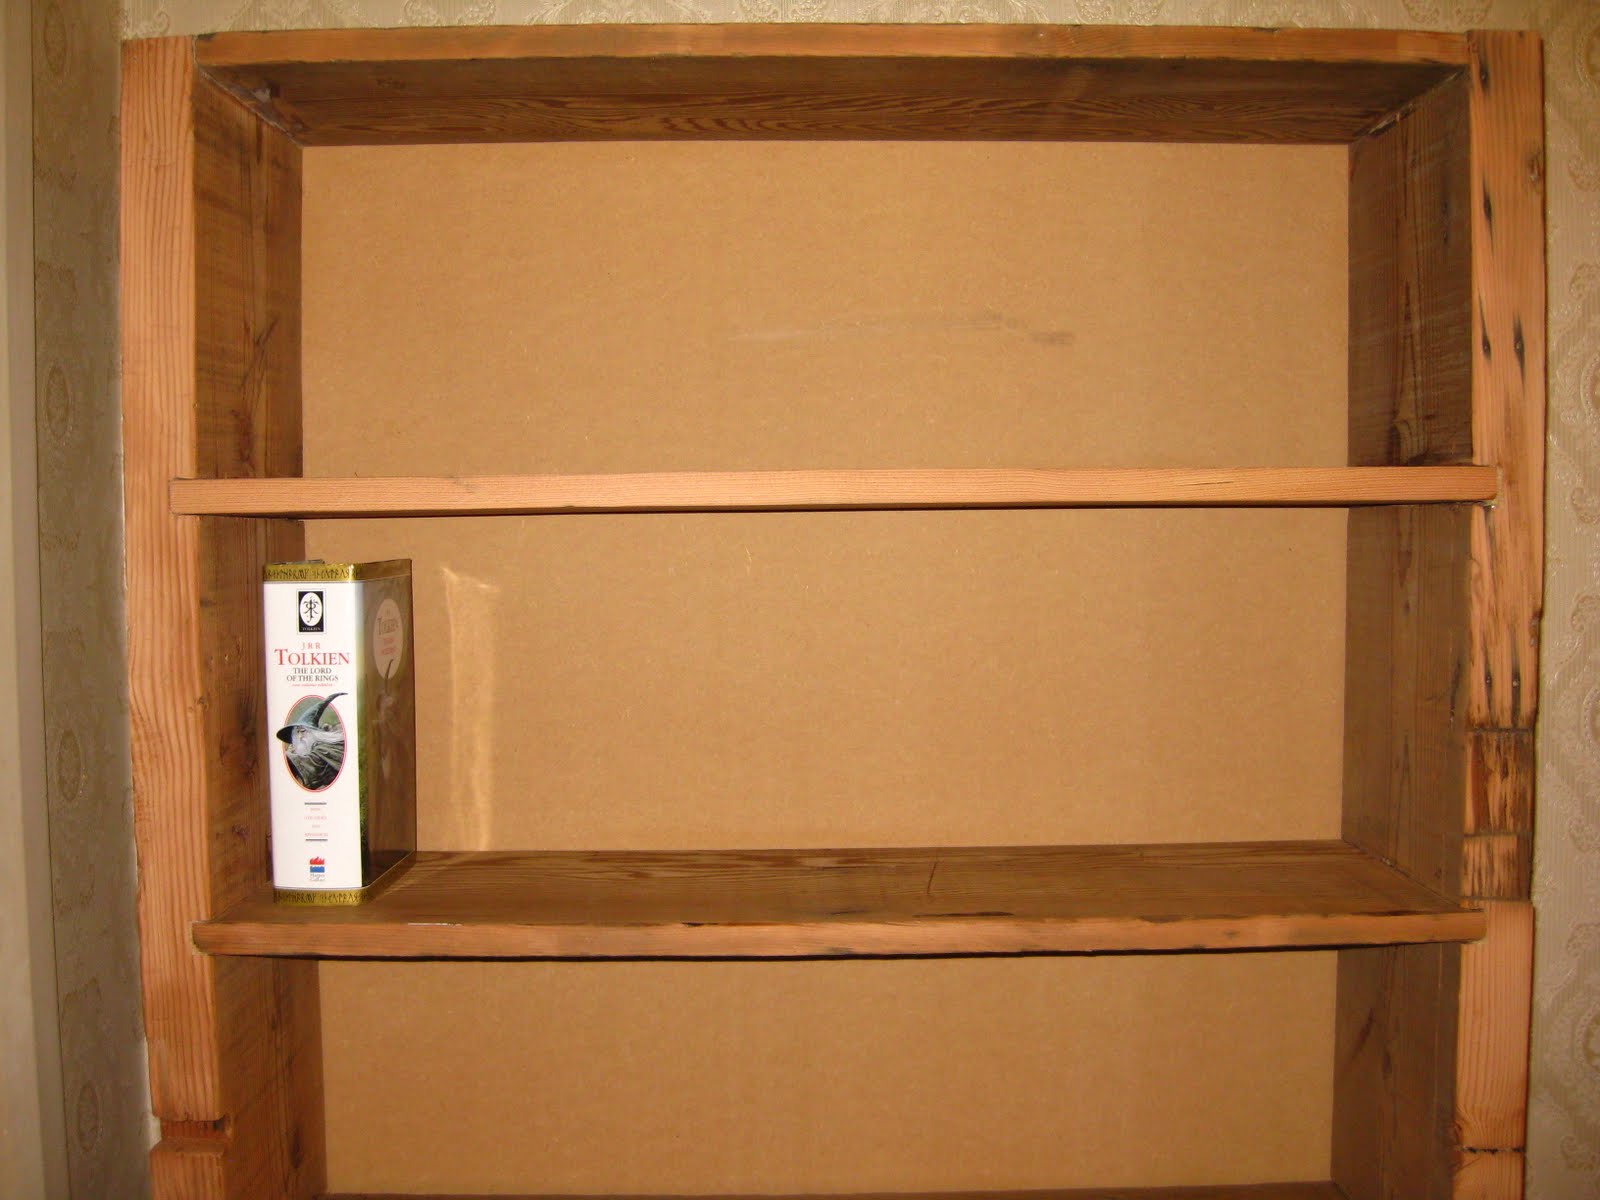
| The original plan |
 |
| The finished article (and yes, the top needs fixing to the wall but it's just like a bus I promise) |
So there we are finished. One solid wood bookcase. If I was to do it again I might have done dowels rather than housing joints but they look good. I don't think the MDF back needed to be so thick.
I am taking a break from this now but we have a long list of furniture needs and stockpile of wood offcuts so who knows what we might come up with?
Monday, 30 August 2010
Cool things I found under the house
We spent a very busy weekend basically working on the house in one way or another. I can't talk about the curtains I spent all of the rainy Sunday making because it's just too depressing, to spend all that time only to be really disappointed with the result...
When I'd had enough of rummaging around in the mud I went back to installing underfloor insulation which took me to some of the dustiest parts of the house. I doubt anyone has had cause to go there for m any years, given the lack of concern for the drains....

 way or another. I can't talk about the curtains I spent all of the rainy Sunday making because it's just too depressing, to spend all that time only to be really disappointed with the result...
 Anyway I will maybe tell that story another time.
So what I did do this weekend is dig around under the house. It rained almost all weekend and I had noticed that there were a couple  of areas around the house where the rain wasn't draining too well. (Steve's previous blog about the squelchy moss was one of them....) Anyway I thought about this and figured that logically, water shouldn't be collecting in a concrete yard - then did a bit of digging (literally) in a few likely spots and discovered two drains, both completely covered with mud. The second one was completely blocked and required me to lie in the mud with my arm right down it to unblock it.... Very satisfying when it clears though... I just wonder how long it must have taken for decomposing leaf litter and mud to completely cover up a drain such that you can't even tell where it is?
 of areas around the house where the rain wasn't draining too well. (Steve's previous blog about the squelchy moss was one of them....) Anyway I thought about this and figured that logically, water shouldn't be collecting in a concrete yard - then did a bit of digging (literally) in a few likely spots and discovered two drains, both completely covered with mud. The second one was completely blocked and required me to lie in the mud with my arm right down it to unblock it.... Very satisfying when it clears though... I just wonder how long it must have taken for decomposing leaf litter and mud to completely cover up a drain such that you can't even tell where it is?
While lying in the mud I noticed this bone pendant sitting in a puddle. I'm sure it's some genuine 400 year old maori taonga.
When I'd had enough of rummaging around in the mud I went back to installing underfloor insulation which took me to some of the dustiest parts of the house. I doubt anyone has had cause to go there for m
 any years, given the lack of concern for the drains....
But I did find this cigarette packet. Notice anything about it?
... No health warning. In NZ they were introduced in 1974 which means this packet is at least 36 years old.
And I saved my most exciting find til last: An old, rusty metal sign lying in the dust turned out to be one of those cool old advertisements for Van Houten's cocoa which I think is one of the best brands of cocoa still. Shame it's a bit rusted away but rest assured it'll end up inside the house not under it eventually...

Sunday, 22 August 2010
Getting back into it
We had to have a break as this renovation lark can get a bit heavy sometimes, so last weekend we ran away up north to the shores of Lake Taupo. Unfortunately the rain followed us so we couldn't do any skiing, but we did plenty of relaxing and thinking about what we'd like the house to look like. We got out the coloured pencils and did some 'artist's impressions'.
But this weekend we got back into it with a vengeance. I went and bought a spade and cleared the back yard of all the squelchy moss that has built up as a result of the neighbour's tree diverting heavy rain from the gutter to our backvyard. At the same time I kept an eye on the sunshine, we're now getting sun in the back so we're making a record of what gets sunshine so we can work out where to build the deck. The present location of the compost heap (go figure!) is looking like the best bet.
We reckon we'll get about 8 months of sun in the back yard - we've just endured the 4 months of gloom.
We replaced a bit of the porch, can you spot the difference?


Well, ok, it is the cross beam on the left. I machined a bit of 2 by 4 in my woodwork class, then we drilled some holes in it so we could nail it into the main struts on the porch, then we filled the holes, then we painted it (after matching the existing colour and buying similar paint). We reckon it adds 5k onto the house value ; )
Speaking of which, Jo continued her 'what the buyers will see first' project and sanded down the flaking fence posts ready for re-painting and made our gates close by screwing in the hinges.
We went and bought some underfloor insulation and started with the worst corner which Jo described as a coffin to wriggle into to try to fit the polystyrene tiles. Technically we can now take up some of the carpet above to see what the floorboards look like underneath. (we've been waiting for either summer or the insulation before taking up the disreputable threadbare brown shagpile carpet). We're hoping for some lovely rimu floorboards ready for sanding.... fingers crossed.
Next up - curtains, fences, and furniture...
 |
| Artist's impression of the view into 11 Howard Street. Note beautiful handmade hall table to the right and handpainted cabbage tree on rear hall wall |
 |
| Artist's impression of stained glass windows at 11 Howard Street |
But this weekend we got back into it with a vengeance. I went and bought a spade and cleared the back yard of all the squelchy moss that has built up as a result of the neighbour's tree diverting heavy rain from the gutter to our backvyard. At the same time I kept an eye on the sunshine, we're now getting sun in the back so we're making a record of what gets sunshine so we can work out where to build the deck. The present location of the compost heap (go figure!) is looking like the best bet.
We reckon we'll get about 8 months of sun in the back yard - we've just endured the 4 months of gloom.
 |
| Celebration time at no 11 as the socks get some sunshine |


Well, ok, it is the cross beam on the left. I machined a bit of 2 by 4 in my woodwork class, then we drilled some holes in it so we could nail it into the main struts on the porch, then we filled the holes, then we painted it (after matching the existing colour and buying similar paint). We reckon it adds 5k onto the house value ; )
Speaking of which, Jo continued her 'what the buyers will see first' project and sanded down the flaking fence posts ready for re-painting and made our gates close by screwing in the hinges.
We went and bought some underfloor insulation and started with the worst corner which Jo described as a coffin to wriggle into to try to fit the polystyrene tiles. Technically we can now take up some of the carpet above to see what the floorboards look like underneath. (we've been waiting for either summer or the insulation before taking up the disreputable threadbare brown shagpile carpet). We're hoping for some lovely rimu floorboards ready for sanding.... fingers crossed.
Next up - curtains, fences, and furniture...
Subscribe to:
Posts (Atom)