 The plasterer then came in. His job is to plaster up the lines between the gib board and the nail holes. Damon was a cheerful chap who was a bit nocturnal, showing up about 5pm to start work. He was pretty reliable though which is the main thing. He finished on Saturday at lunchtime and we then moved on to painting. We decided to paint now as it is much easier before the bathroom fittings are installed.
  So mid way through the painting, the base coat is on, and we're onto the top coats. That's me getting more paint off to the right.
We'd chosen to use the colour of the wall tiles for a couple of walls and the red from the glass tiles for one wall and the ceiling. A brave choice, but we think it works....
 This is an old chair I bought and repainted the colour of the other glass tile. Mum and Dad had the seat re-upholstered. Eventually this will be where you leave your clothes when you have a shower.
 Finished paint job! It looks better in natural light, and as you can see, we are still waiting for our electrics.

 This is an old chair I bought and repainted the colour of the other glass tile. Mum and Dad had the seat re-upholstered. Eventually this will be where you leave your clothes when you have a shower.
  Finished paint job! It looks better in natural light, and as you can see, we are still waiting for our electrics.
We have the plumber lined up for Wednesday. With any luck this weekend will be the final one without shower, toilet etc. It will be four weeks since we started on Tuesday and we are getting quite fed up of living in a construction site. But I'm not counting on it!


 I had decided to glue building paper to the joists to provide a bit more of a weatherproof seal between the weatherboards and the insulation. This is not an orthodox procedure but can't hurt, and should provide a bit more wind-proofing. Only problem was the joists were so dusty the glue didn't stick so I ended up just wedging the paper in place.
  Nearly finished!

 This is the new window I had made for $400. Tom then said he could have done it for $200! Typical. But at least it no longer has louvres which let the wind and rain through.
 Both of the windows with new framing.
 So Tom finished his gibbing and window-ing on Saturday (he was much more effective with us there watching and no beers on hand) and on Sunday we laid out the underfloor heating cable. This is not a difficult task but you can't cut the cable so you have to lay it out precisely to line both ends up with the thermostat lined into the wall. You tape down the corners and then the tiler lays a levelling compound (type of cement) over the cables to make a smooth surface for tiling.

 This week: tiling. I think we'll have one more week of no bathroom facilities but with any luck should have a toilet and bath by next week. Fingers crossed....


 I was not amused, particularly about the pipe slung under the joists as long term we want to convert the basement and this arrangement means we can't install a ceiling there because there's a pipe in the way! The plumber is apparently not amused with us, either, but that's just tough. Our house is a dream to plumb with full head height basement, easy money for a plumber and they've taken the easy option as far as I can see, as connecting into existing waste pipes is obviously a bit more tricky, but we intend to get this fixed, so watch this space.
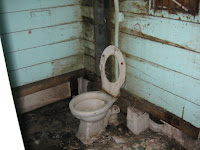
 Anyway we obviously have no bathroom while all of this is going on. We do have a toilet, in the basement. To use it you have to go outside, down the stairs, unlock the basement, use a headtorch to get to it. Steve found a guest in there earlier....
 This is a weta, a native NZ species. We were quite excited to find him in there.


