Sunday, 10 June 2012

A whiter shade of pale

Well I think these deck stairs are starting to look really good, what do you think?


We take pride in our colour choices. We agonise for days about different shades. We must have all the Resene paint colour swatches. So we thought a nice off-white with a hint of green would go nicely with the red kitchen units. Jo liked the fact it was called Ionian, like some Greek god of kitchens. So when we asked when they would be doing our final coat of Ionian only to be told the white walls were in fact Ionian, we were a bit confused. It didn't look like the Ionian colour we had chosen. So, after we were blamed for choosing a niche paint colour, which seems a bit unfair, it turns out the paint mixer has done this before and not quite matched the colour very well (or even close which surely means they have failed as a paint mixer). So we are going to get the kitchen in and then see if we want to get the proper colour painted. 

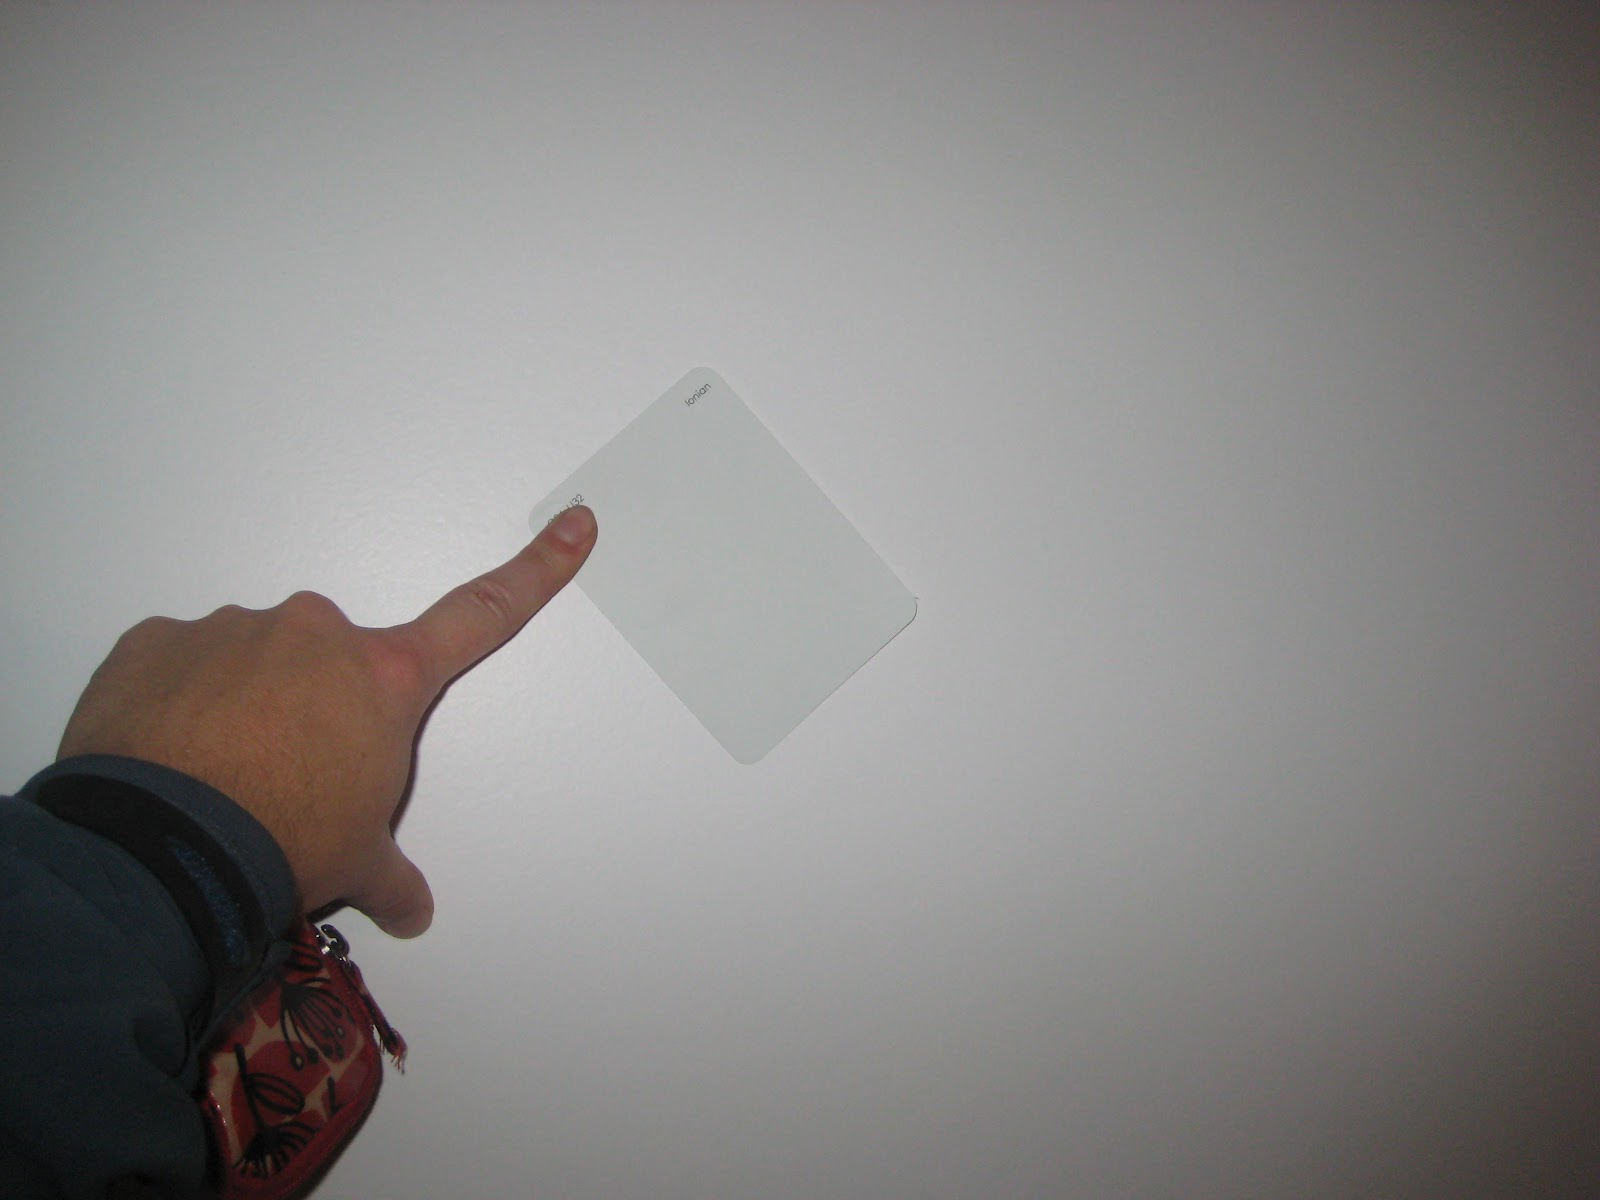
The Ionian colour card against the wall apparently painted in Ionian. If only the painter had done this kind of comparison before he painted 128 square meters of it. 

We had planned to tile the area under the kitchen and island, and then leave the rest of the room as floorboards. But we decided not to because it would create a lip between the tiles and floorboards which might be annoying when moving the island stools out or trying to place the dining table. We have instead decided to go with the existing floorboards so that there is one level floor throughout the room.  

Another insight into the history of the house.  This is before our time - the cut out section is where stairs down to the basement used to go. The steps are still in the basement. This section, and the triangular section in the top left, now need to be replaced to blend it in with the surrounding floorboards. 


The work in progress to replace the cut out section. 


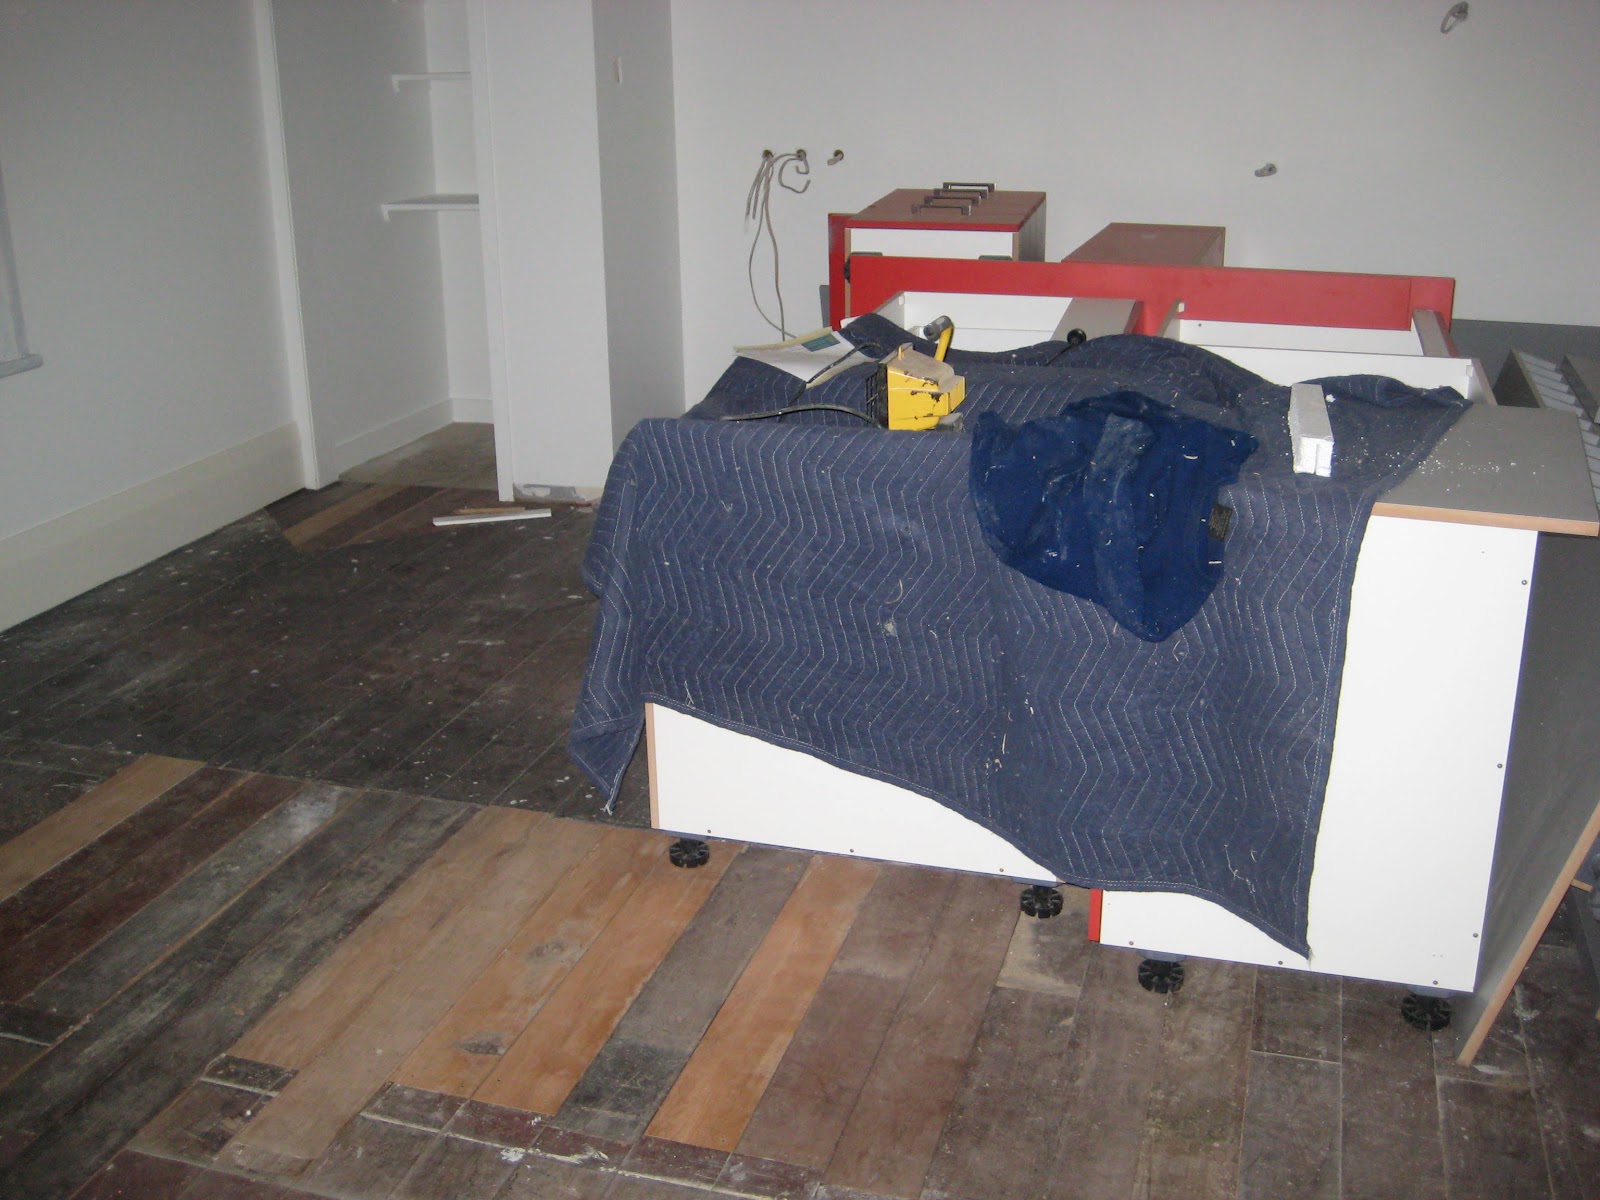
Spot the kitchen. Despite the fact that we had made the decision to not tile the floor which meant they couldn't put the kitchen in yet, Goldmark insisted on bringing in the kitchen and all our kitchen appliances which have now filled up our second bedroom. 
Central heating update: hopefully it will be turned on tomorrow. 

Mouse update: mice not dead despite putting down loads of poison - there's too much other food for them to eat. They are now scrabbling around the walls in the middle of the night. 

Saturday, 19 May 2012

The lowest of the low

We hit the nadir this week.  At least I hope it's the nadir, or we are in trouble.  It's mainly to do with the never-ending clutter and inability to move freely.  Just when you think we've got all the crap the house can handle, the builder brings in some gib or something to clutter up the hall some more.  Also, it's very frustrating that not one single aspect of this project has been finished.  And therefore we still have the basement, garden, kitchen, dining room, hall, laundry, and front bedroom  (to a greater or lesser degree) out of action.  The only untouched room is the bathroom.  But even that suffers plastery footprints and lots of dust and needs constant cleaning.

The valuer came in this week - we await his verdict with baited breath...

Progress this week centred around the walls of the main kitchen/diner.  The gib is starting to go up and the electrician has been in.  We now have no lights in the room as they've gibbed over the ceiling.


New window to go in to the left - it's the horrible one out of the kitchen but will  be all done up and double glazed and will match the blue one to the right
I noticed that the builders have sourced some extra tall gib - normally it comes in 2.4m long sheets, but our ceilings are 3.6m and it goes right up to the ceiling.

The electrician came in and started putting the wiring in.  Having counted the number of plugs currently in use behind our telly - 11 (Modem * 2, digibox, TV, VCR, DVD, Xbox, Playstation, Amp, CD player, PC) - we asked for that many sockets in the new TV corner but were told it would be inordinately expensive as a new RCD (residual current device) would be required.  So we had to settle for 6.
extra tall gib - 3.6m with wiring - only 3 double sockets, we wanted  6


The builders' home made scaffold for gibbing the ceiling.
builders don't hire scaffold, they build it!
The deck looks good, but still needs its stairs

the nearly finished deck
 I wish they'd just get on and fill in the trench already.  Don't know what they're waiting for now but it makes me nervous, the house next door is not supported by much with the trench like this.

The nearly finished retaining wall complete with drain
 Pantry is getting there.  I think it will be really good eventually...

half gibbed pantry plus wiring
 Day to day life in the hall...

just when you think the house couldn't possibly get any more crowded... the radiators arrive (behind box at left)

oh and then the gib arrives too
Sunday has been sunny so I thought I'd work outside.  As we have so many bricks I am working on edging the house.  Apparently the building code says earth shouldn't touch weatherboards so I am working my way along the front of the house digging down to the bottom of the weatherboards and then putting a brick edge in and leaving a gap so the boards can breathe, or whatever they do.


my sunday afternoon project.  Original front of house with grass hard up against weatherboards

 Steve says this project of mine is a waste of time, but it's good to keep busy and not have to look at all the clutter inside for a while.  And it will make mowing the lawn much easier.

New border to house, bricks and a gap to the base of the weatherboards

Steve contemplates the devastation.  At least it is a sunny day
The washing up area.  Sink is too low and there's no draining board.  And the cold tap doesn't work.  And if you're not careful you hit your head on the shelf above.  But apart from that, it's fine.

To finish on a positive note, the leadlights are looking great now we have winter sun on them.


And finally.  Someone is really enjoying our building work.  Our mice are back and loving the fact that there is food everywhere.  We hear them scuttling around behind the boxes of food conveniently left on the floor for them. Enjoy it while you can, mice!

Sunday, 6 May 2012

And the walls came tumbling down.


Last Sunday night we bade farewell to our kitchen and moved all of the stuff out of it. We now eat our meals in the living room where we have put the kitchen table, microwave, toaster and the George Foreman grill. Funnily enough the living room is now bit like the living area we are trying to create in the kitchen, except there's no oven, fridge or sink. The fridge is in the hall. And the rest of the kitchen is in the front bedroom, along with our bikes which are still living in the house because the basement is out of action. So we have a few rooms full of stuff, but have managed to keep our bedroom free of any of it. It is our haven.


Hasta la vista, kitchen


Another joyful discovery - the sink held up with a bottle and piece of wood.


On Monday the kitchen units are all unfixed from the walls. Apparently the sink dropped out as soon as it was moved.


We talked about selling the kitchen units on trademe, then we came to our senses.

On Tuesday we came home and went into meltdown as the kitchen wall and ceiling had been removed!!! The kitchen and dining room were now one space. The false ceiling hid a wooden ceiling of many different shades (it is very dark in place, possibly damaged by fire?), and a bit of old wall paper. We had electrical wires hanging down all over the place.


The ceiling and kitchen wall are removed. It was like Christmas come early.

Where the wall was, as seen from the ex-kitchen
Where the wall was, as seen from the ex-dining room


David Hasselhof singing about the day the wall came down


Not a place for small children - bare wires on this hanging plug socket.


The oven still outstaying its welcome.
The other main focus this week was the deck. It was attached to the house and the framework for the floor was laid. It has about 100 bolts in it according to Phil, which is quite a lot but the council insist on these things. The west wing wall had concrete poured into it, and all that is needed for that now is timber for the top and the trench filled in.


The deck has 100 big bolts in it so that we can have hordes of people dancing on it

Unfortunately it has been cold in Wellington this week and with the various holes and missing gib on walls, the house has been FREEZING. At the end of the week Phil put some insulation in the draughtiest bits, as he had noticed it had been a bit chilly when he was standing by a big hole making his tea.


Friday, 16 March 2012

Ceiling Gibbing, Plastering and Painting

I have alluded to the ceiling regibbing before but thought it would be good to illustrate how far we've come with a series of photos.  Especially as we seem to have four rooms all at different stages of the process at the moment!

The original ceilings - the dining room still looks like this
The stripping process, taking the chipboard off

What's left once the chipboard has gone.  The good thing about these old houses is they really built them solidly, with ceiling boards.  Much easier to regib than having to hit the joists every time.

Airfoam wall insulation left these little plastered holes in the walls

The regibbed ceilings with screw marks and joints


The plastered and recoved ceiling - the living room still looks like this
With undercoat.  The hall and main bedroom are currently at the undercoated stage
And the final repainted product (apart from the floor and skirting).  The airfoam holes and gib joints can't be seen at all.  The guest bedroom currently looks like this.
I do like to put a cost on our work as it's always interesting to look back, and hopefully is useful for others too.  I will have to make up a few numbers but this should be about right:

Stripping - we had to hire a scaffold twice, say $200
Skip - $200
Gib - about 20 sheets at $25 so $500
Gib lifter - hired twice, say $100
Plasterer - had to plaster ceilings in four rooms, plus skim coat two rooms, plus coving.  And these are big rooms with high ceilings - about $3300
Coving (we bought one lot before we found the plasterer could get it cheaper - $270!!! for one room!!!
Undercoat - about $150 per room so $600
Paint - about $200 per room so $800

Total... $5970...
Wow.  Steve had no idea what he was letting himself in for when he started pulling the ceiling down!!!
And time wise, I think the ceilings first started coming down about May last year.We just have to paint now so it's taken the best part of a year to get to this stage.


Sunday, 11 December 2011

Leadlights!


So I have been working hard for a year and a half trying to deliver my leadlight project. I've already described the process so this is just the "look what I did" blog.


A reminder of the original concept: 
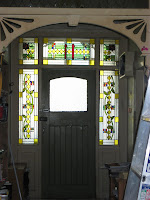
And this is what we had before. Someone has replaced top right and top left with chipboard panels and painted the centre top glass a khaki green colour (why?!?) So light in the hall was a bit limited.Here's the view from the outside. The leadlight teacher reckons it was once all coloured glass panels which probably became broken and were never replaced.


So after 1.5 years I finally finished! Here is Greg the leadlight teacher having removed all the glass and chipboard from the door. Much more light. The chipboard panels top left and right were full of borer.

Leadlight 1 goes in.


And the end result - by day from the far end of the hall. Lets in much more light which is great.
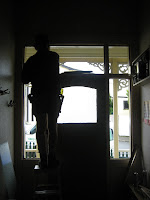
By night viewed from the outside:
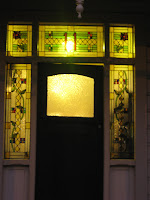
And from up a ladder:
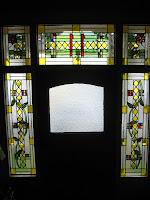
So overall this is about 120 hours work. I got much much faster as I went along and if I did it again I could probably do it in about 80 or so. Greg says he'd knock it out in 40.


The toughest panels were top right and left, the flowers were really difficult to get to fit together. The side panels were also challenging but I had got more skilled by then I think. Though we did smash a couple of the internal glass panes after the leadlight was put together by being too rough with it which wasted a lot of time in fixing them.


Total costs:


Leadlight courses: 6 * $180 = $1080

Lead: about $350

Glass: $460

Tools, stationery, cement etc: $130

Solder: $60

Total costs: about $2080


Greg says to commission this set would cost about $7000 so considerable saving by DIYing. But then again my time is precious too.

I may still do a matching panel for the door, but haven't decided what it should be yet. Let me know what you think!

But first I want to have a little break and focus on wallpaper stripping. :-)

Thursday, 1 September 2011

Airfoam-tastic

Here are some photos of the wall insulation we had done - or rather, the patched up holes left behind.

iHaving insulated the loft space and the underfloor it was just the walls left to do and there only really seemed to be three options -

1) Remove the gib, insert batts behind, then reinstall gib and replaster
2) Install polystyrene sheets on the inside of the external walls and plaster over the top (not sure what happens to plug sockets though so that wasn't really an option
3) Airfoam - a cavity wall insulation inserted into the walls In the end it really was a no-brainer - the re-gibbing, though not difficult, would become very expensive after a while - each sheet of gib costs $25 and covers 1.2m *2.4m - with 3.6m high walls it doesn't take much to work out that a single wall would probably cost about $500 to regib in gib board alone, but then you add the labour and the batts and the plastering... Also, our house has what's called sarking, or horizontal boards behind the gib, which add insulation, and are very useful if you want to fix anything to the wall - and to fit batts they'd all have to go.


So we went for Airfoam which seems to be the only provider of cavity wall insulation in NZ. Because our house (with the exception of the bathroom which we insulated anyway) hasn't been decorated we elected to have the foam squirted in from the inside - this reduced the cost a bit (presumably because it wasn't necessary to hire scaffolding).


The process only took a day, and cost $4000. As you can see they drill holes between each joist and squirt in the foam which starts at the consistency of shaving foam, before firming up over a couple of days. The company then patch up the holes left behind ready for repainting.

After it was done we were supposed to leave all the windows open for a month to ventilate and allow the foam to cure! Which was a problem as we had it installed in the middle of winter so we didn't ventilate much, but lived to tell the tale.


Anyway a month or two since it's difficult to quantify the effect, but basically unless we're in the middle of a "polar blast" the house is warm enough just with the electric heaters, so I think that's a notable improvement. We definitely won't save on heating bills, but just making the house a nice temperature was always the main goal so we're pretty happy.